> ## Documentation Index
> Fetch the complete documentation index at: https://docs.airys.chat/llms.txt
> Use this file to discover all available pages before exploring further.
# Bucket S3
> Configure um bucket Amazon S3 como armazenamento no AirysChat
## Usando Amazon S3
Você pode começar com [Creating an S3 bucket](https://docs.aws.amazon.com/AmazonS3/latest/gsg/CreatingABucket.html) e [Create an IAM user](https://docs.aws.amazon.com/IAM/latest/UserGuide/id_users_create.html) para configurar os detalhes a seguir.
Configure as seguintes variáveis de ambiente.
```bash theme={null}
ACTIVE_STORAGE_SERVICE='amazon'
S3_BUCKET_NAME=
AWS_ACCESS_KEY_ID=
AWS_SECRET_ACCESS_KEY=
AWS_REGION=
```
## Política do Bucket S3
Para usar o bucket S3 no AirysChat, uma política deve ser definida com as credenciais corretas. Uma política de amostra é fornecida abaixo, pois as ações listadas são necessárias para que o armazenamento funcione.
```json theme={null}
{
"Version": "2012-10-17",
"Id": "Policyxxx",
"Statement": [
{
"Sid": "Stmtxxx",
"Effect": "Allow",
"Principal": {
"AWS": "your-user-arn"
},
"Action": [
"s3:DeleteObject",
"s3:GetObject",
"s3:ListBucket",
"s3:PutObject"
],
"Resource": [
"arn:aws:s3:::your-bucket-name",
"arn:aws:s3:::your-bucket-name/*"
]
}
]
}
```
Substitua seu *bucket name* nos locais apropriados.
O **User ARN** pode ser encontrado usando as seguintes etapas:
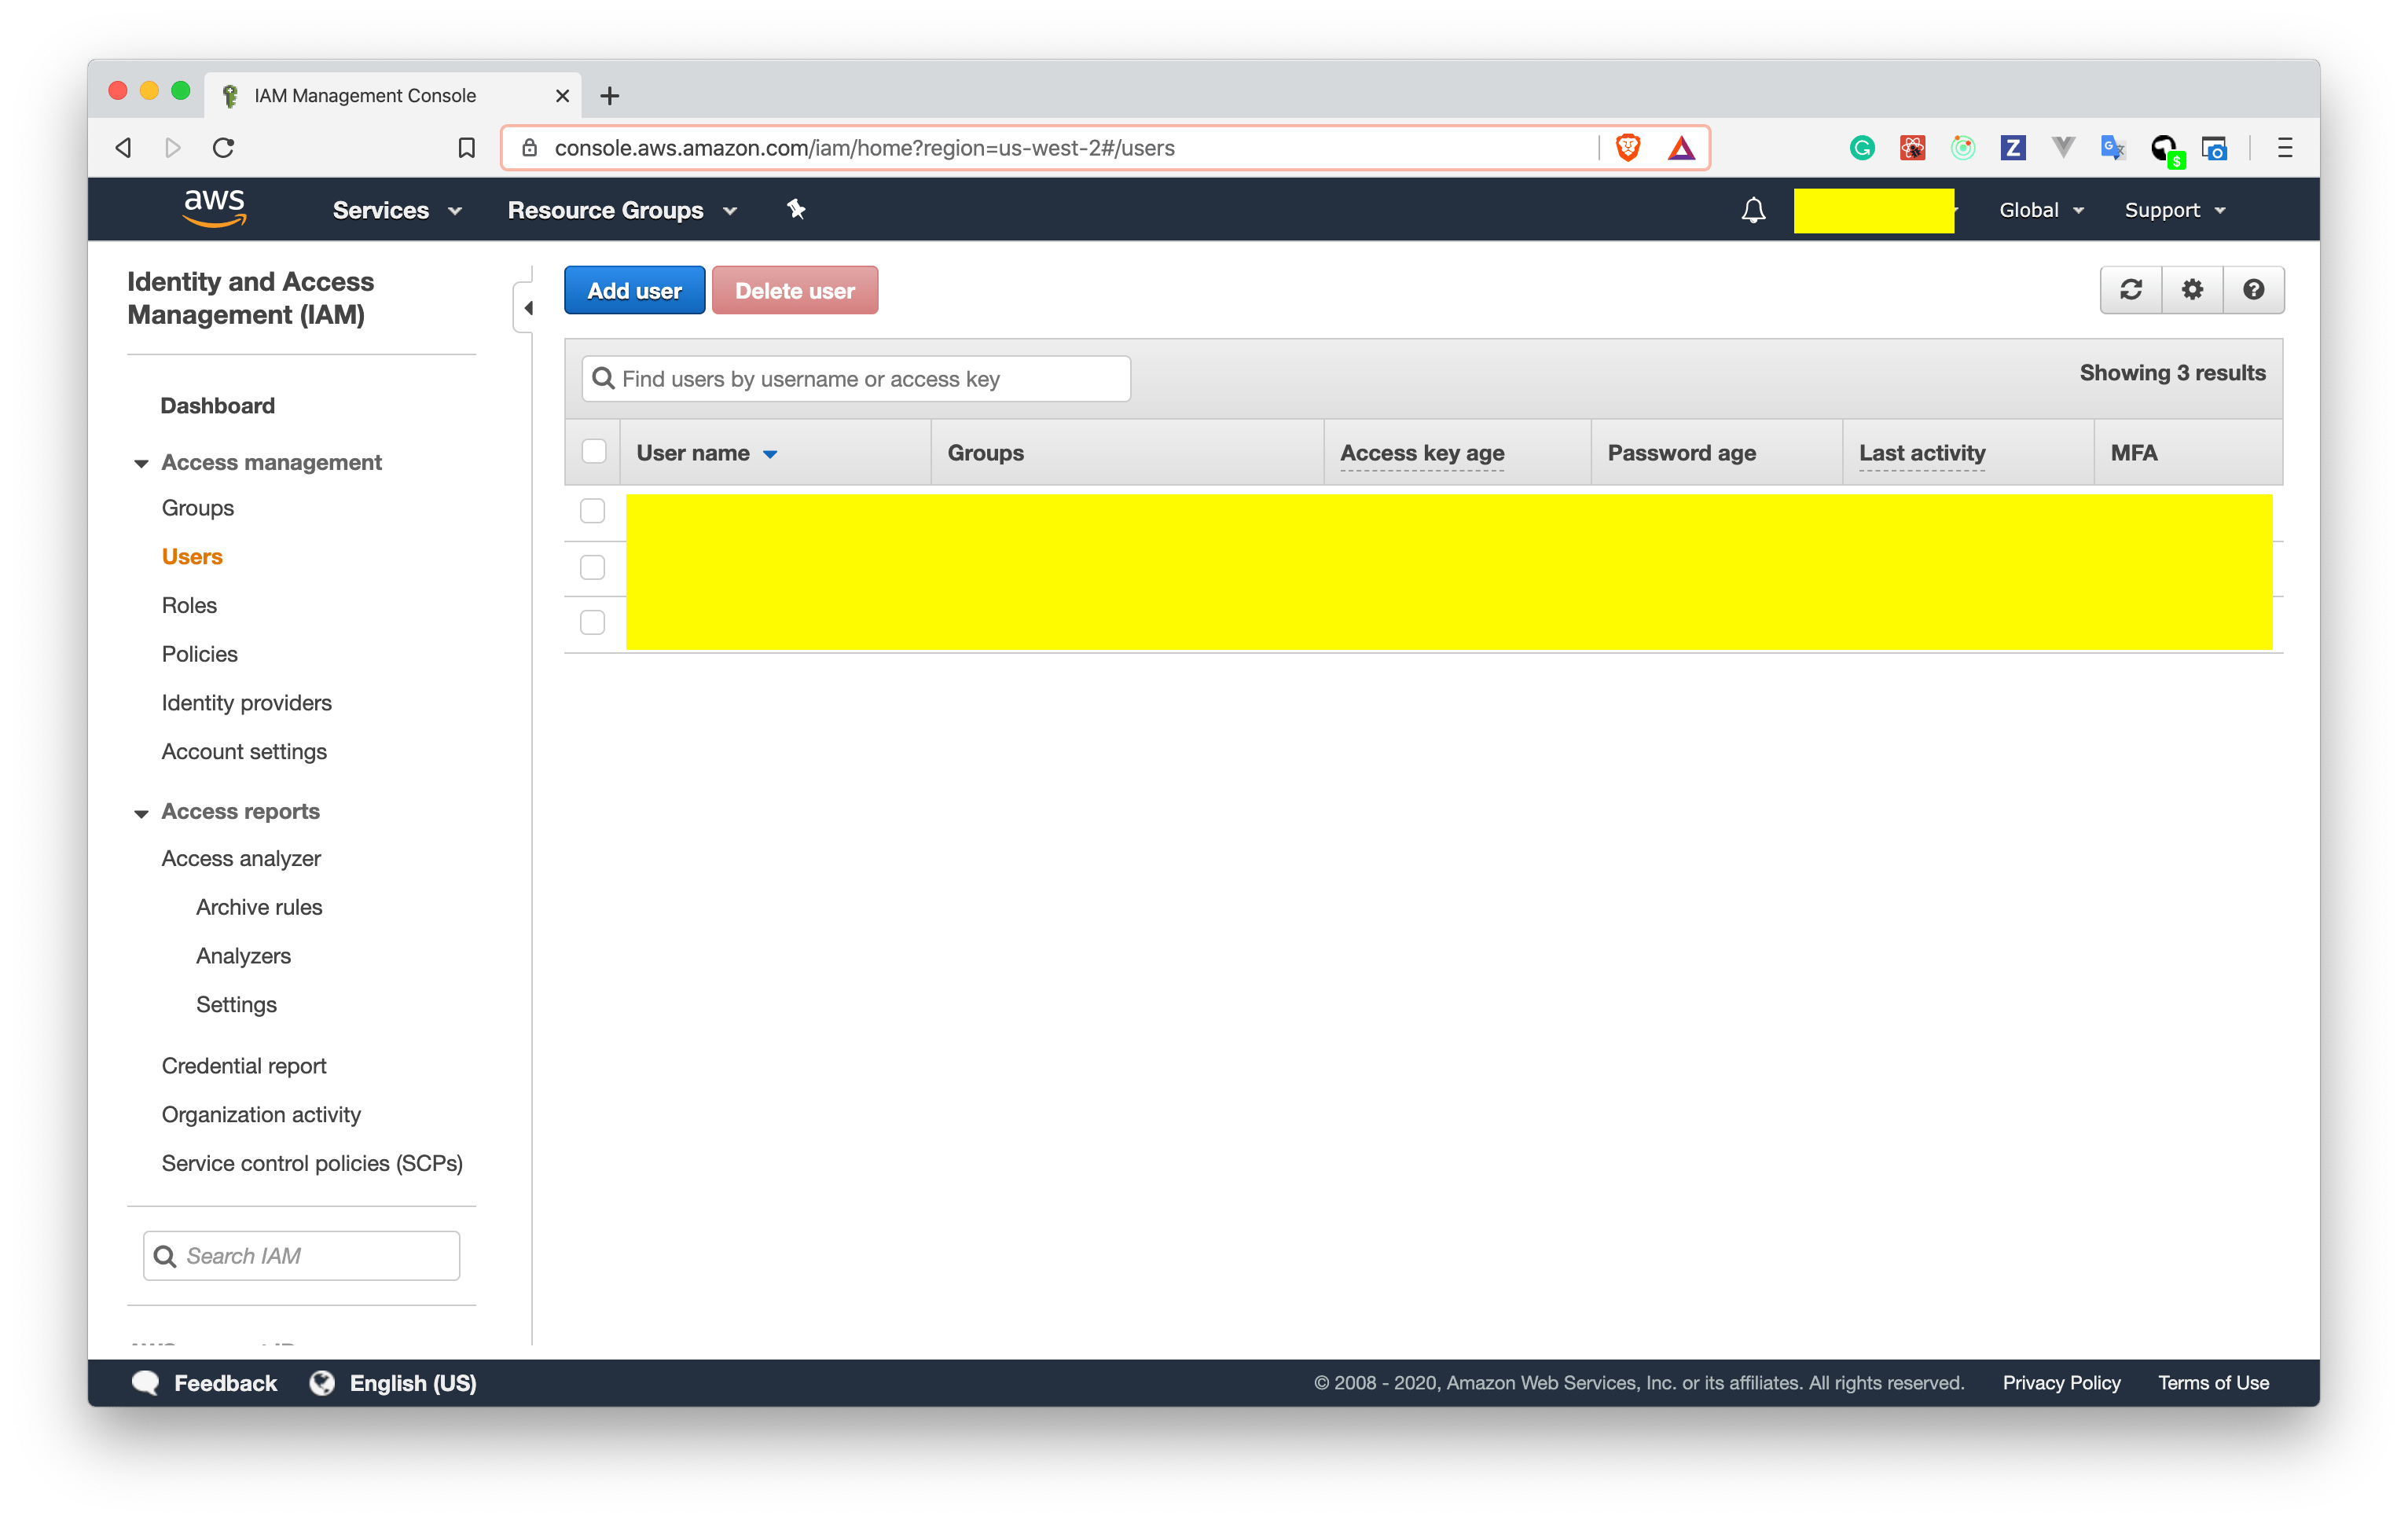
1. Faça login no AWS Console. Vá para IAM e clique em Users na barra lateral esquerda. Você verá a lista de usuários da seguinte forma.
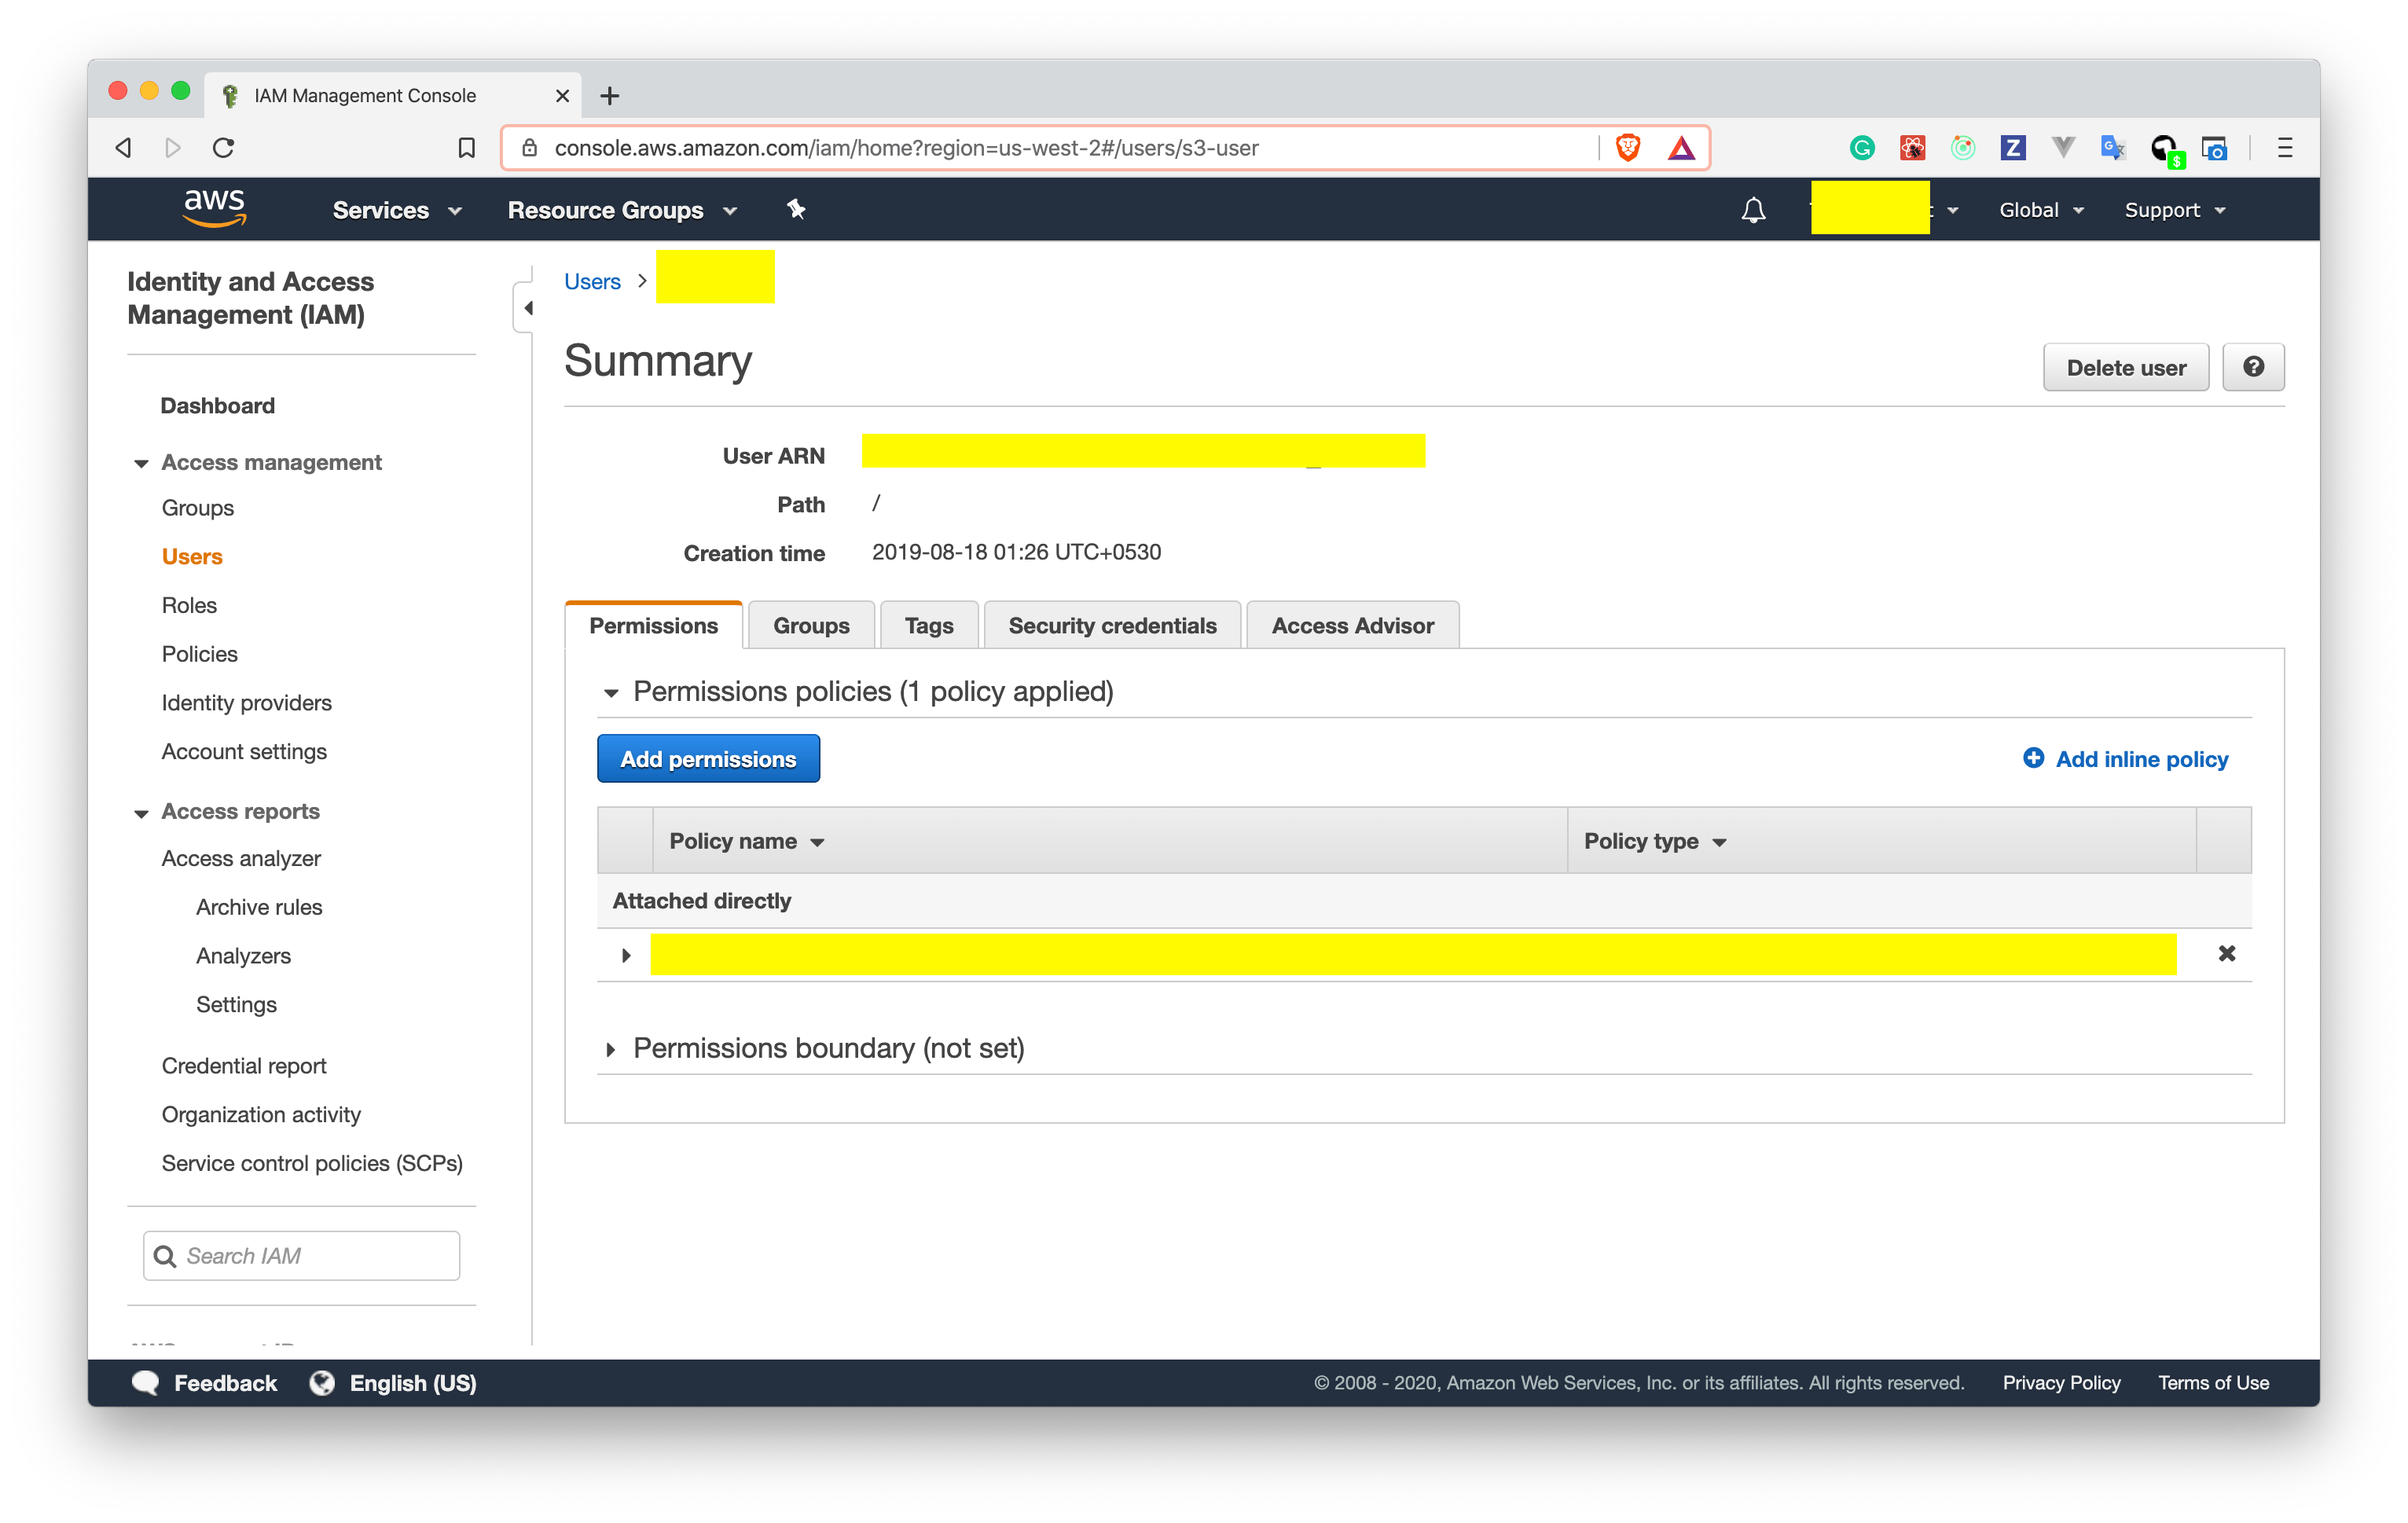
 2. Clique no usuário, você verá uma tela conforme mostrado abaixo. Copie o User ARN e cole-o na política acima.
 **Adicionar configuração CORS nos seus buckets S3**
Você precisa configurar as definições CORS na respectiva nuvem de armazenamento para suportar uploads diretos de arquivos do widget e do painel do AirysChat.
Consulte este link para obter mais informações: [https://edgeguides.rubyonrails.org/active\_storage\_overview.html#cross-origin-resource-sharing-cors-configuration](https://edgeguides.rubyonrails.org/active_storage_overview.html#cross-origin-resource-sharing-cors-configuration)
Para fazer alterações de configuração CORS no S3:
1. Vá para o seu bucket S3
2. Clique na aba de permissões.
3. Role até Cross-origin resource sharing (CORS) e clique em `Edit` e adicione as respectivas alterações mostradas abaixo.
**Adicionar configuração CORS nos seus buckets S3**
Você precisa configurar as definições CORS na respectiva nuvem de armazenamento para suportar uploads diretos de arquivos do widget e do painel do AirysChat.
Consulte este link para obter mais informações: [https://edgeguides.rubyonrails.org/active\_storage\_overview.html#cross-origin-resource-sharing-cors-configuration](https://edgeguides.rubyonrails.org/active_storage_overview.html#cross-origin-resource-sharing-cors-configuration)
Para fazer alterações de configuração CORS no S3:
1. Vá para o seu bucket S3
2. Clique na aba de permissões.
3. Role até Cross-origin resource sharing (CORS) e clique em `Edit` e adicione as respectivas alterações mostradas abaixo.
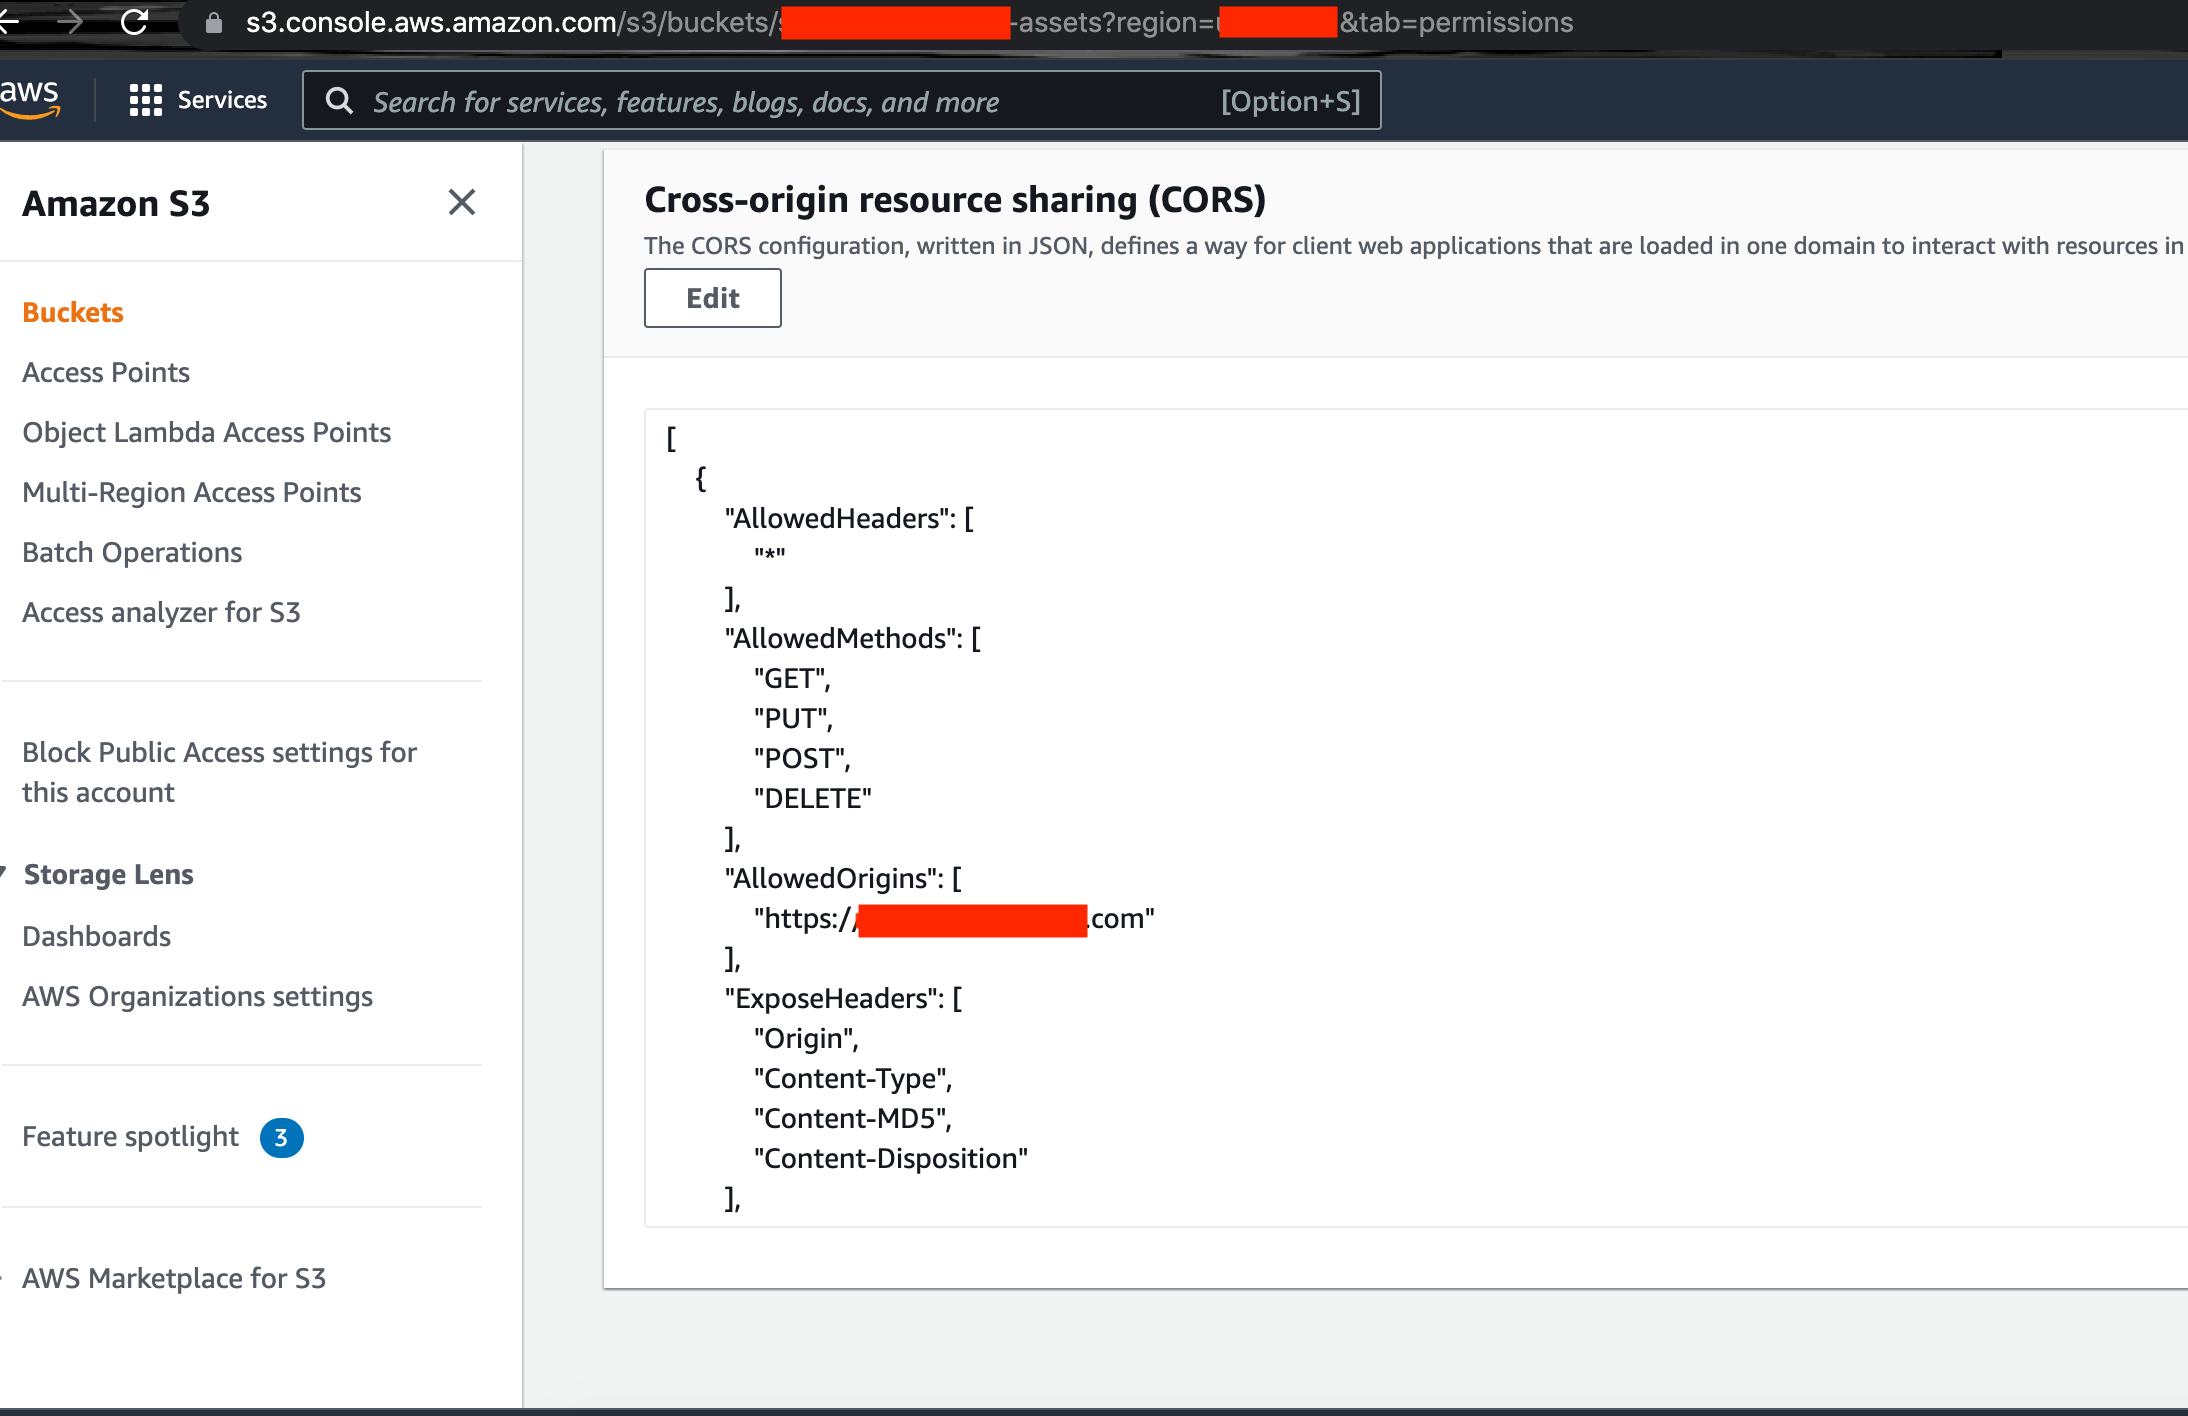 Adicione a URL do seu AirysChat no `AllowedOrigin` conforme mostrado abaixo.
```json theme={null}
[
{
"AllowedHeaders": [
"*"
],
"AllowedMethods": [
"PUT",
"POST",
"DELETE",
"GET"
],
"AllowedOrigins": [
""
],
"ExposeHeaders": [
"Origin",
"Content-Type",
"Content-MD5",
"Content-Disposition"
],
"MaxAgeSeconds": 3600
}
]
```
Adicione a URL do seu AirysChat no `AllowedOrigin` conforme mostrado abaixo.
```json theme={null}
[
{
"AllowedHeaders": [
"*"
],
"AllowedMethods": [
"PUT",
"POST",
"DELETE",
"GET"
],
"AllowedOrigins": [
""
],
"ExposeHeaders": [
"Origin",
"Content-Type",
"Content-MD5",
"Content-Disposition"
],
"MaxAgeSeconds": 3600
}
]
```